A GCASH Pera Outlet is one way of earning extra income if you already have an existing business.
Transactions that you can earn money from as a GCASH Pera Outlet:
- Cash In
- Cash Out
- Bills Payment
- GCASH Padala (remittance) claims

Business Requirements
Be sure to have the following ready:
- Valid ID
- GCASH account
- Android phone (currently doesn’t work on iPhones)
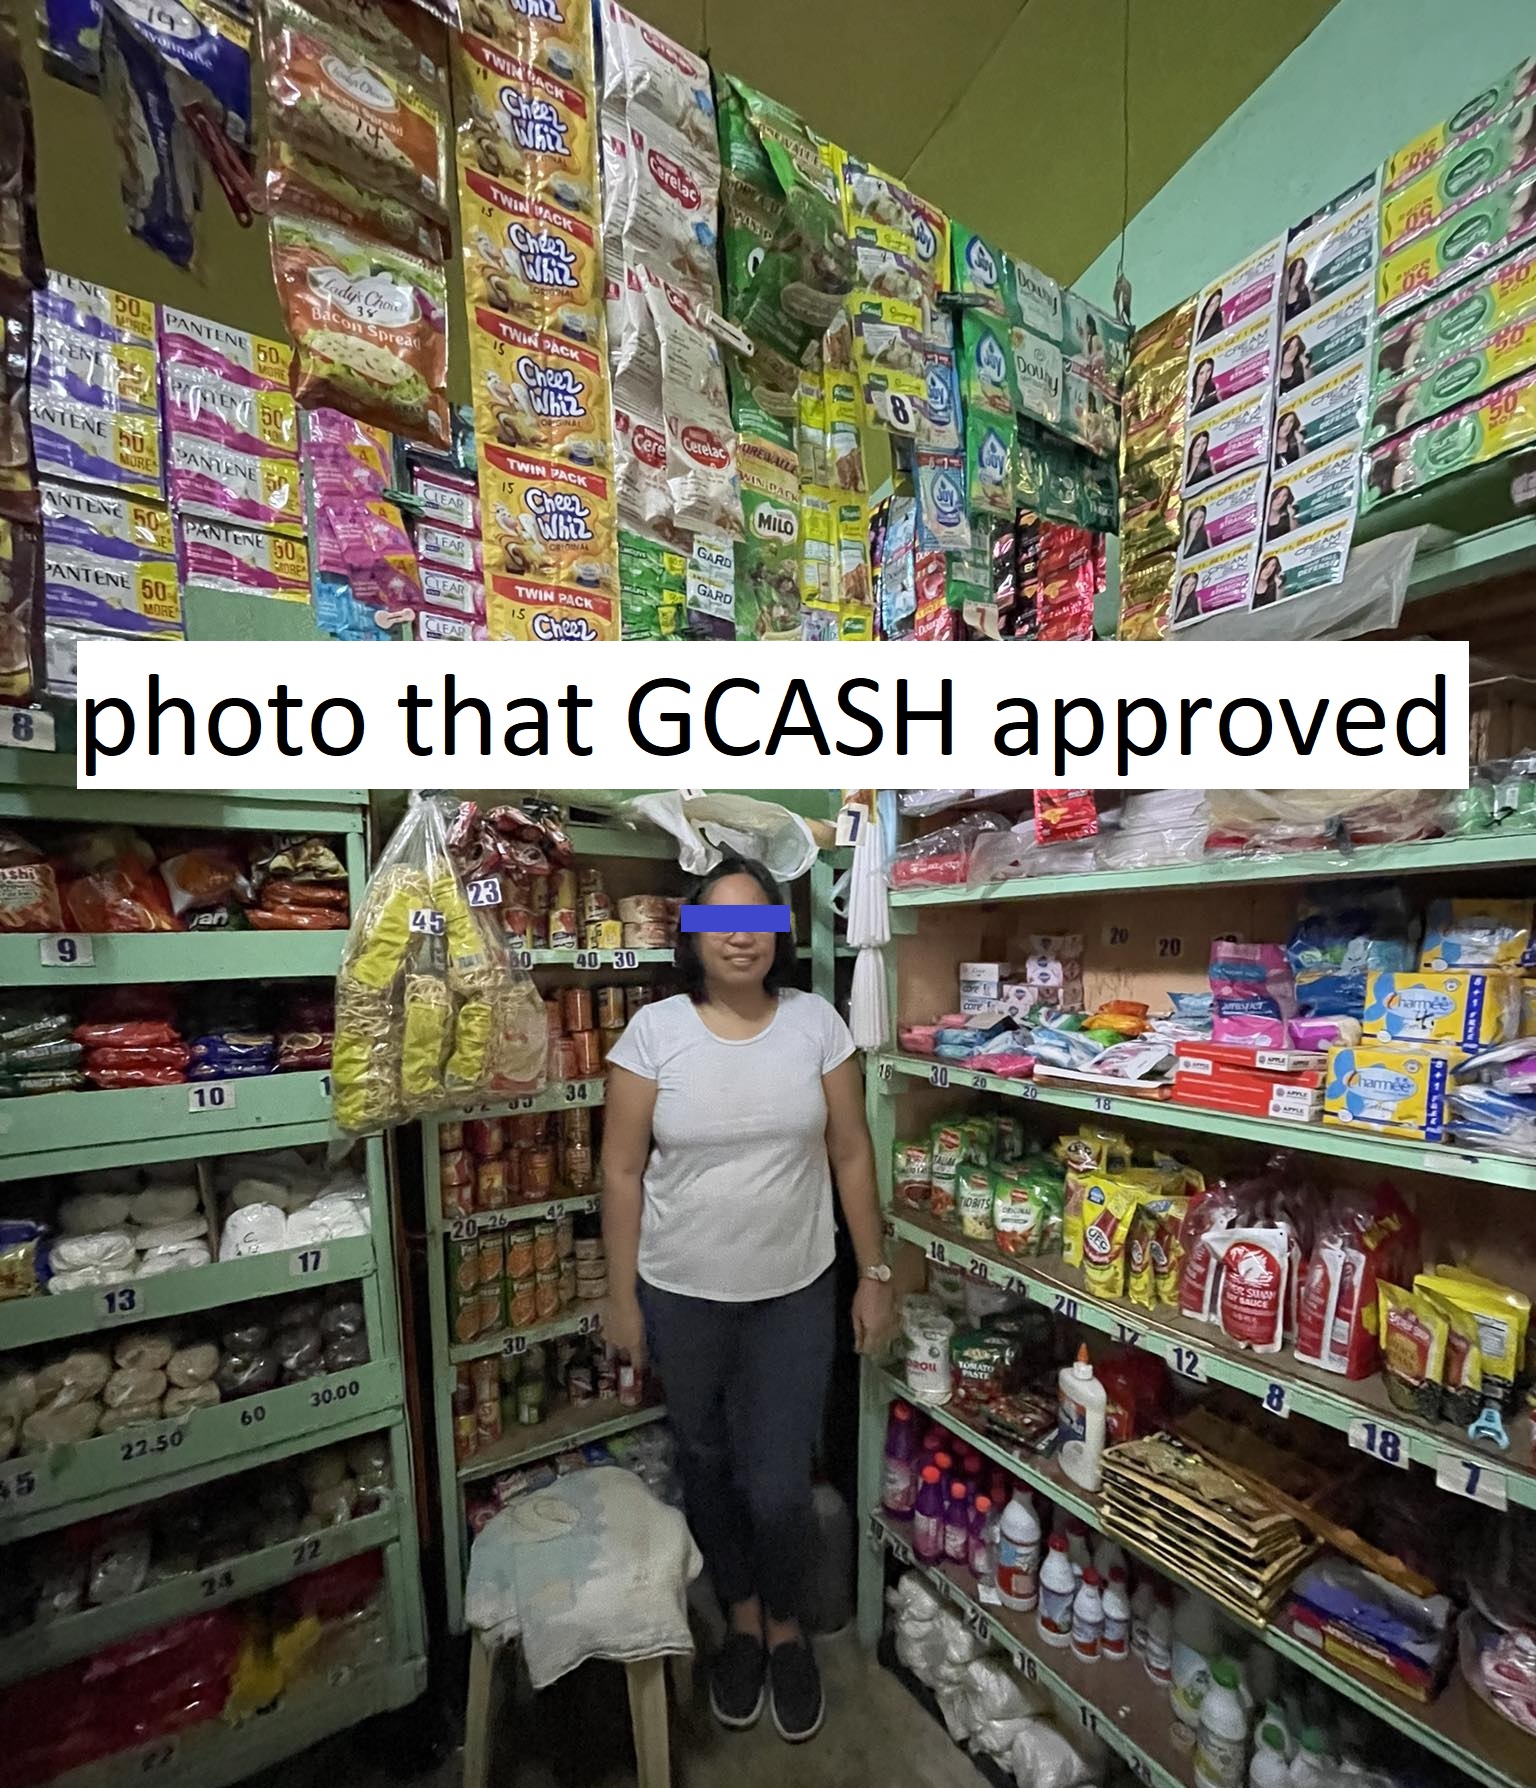
- Photo of the store front (see samples below)
- Proof of business ownership (DTI registration, barangay business permit, mayor’s permit)
- Photo of your signature (three signatures on paper)
How to Apply for GCASH Pera Outlet
Step 1. Using an Android phone, open your GCASH app. Find the “Pera Outlet” mini app.
Step 2. Click on “Get Started.”
Step 3. Fill out the form, double-checking to ensure that you’re providing GCASH with the correct information.
Step 4. Be sure to upload the correct photos. GCASH will give you a chance to change or correct your photos, but this will only delay your application’s approval.
IMPORTANT: Store photos are only accepted if:
- It’s taken in front of the store, with the entire store visible (it’s fine if your store doesn’t have a name as long as the entire store can be seen)
- It shouldn’t be a selfie (be sure to ask someone to take your photo or use your phone’s timer feature to take the picture
- It should be with the store owner and the applicant (if the applicant is different from registered the store owner)


Also, be sure that you’re uploading one photo with your signature (make the same signature three times on a piece of paper).
Another tip: A DTI permit (barangay level) is the cheapest and fastest business document that you can get without leaving your home – you even pay for it online and receive the DTI permit online.
Step 5. Double-check the information.
Step 6. Watch the AMLA informational video – and be sure to take notes or listen carefully because you need to take a test afterward.
Step 7. Once you’re done with the video, take the AMLA test. You can only proceed with your application if you pass the test.
Step 8. Submit your application. Depending on the volume of applications they’ve received, it may take at least a week before you’ll know whether it’s approved or still needs additional/corrected documents.
Step 9. If your application is approved, you’ll receive a message from GCASH and find the GCASH Pera Outlet “activated” on your app.
Step 10. You can start earning money using the GCASH Pera Outlet mini app on your phone.
You can also watch this video as guide:

- Pinay Wins Entrepreneurial Spirit Award in Canada - October 8, 2025
- 6 Best Unlimited Samgyupsal Restaurants in the Philippines - July 18, 2024
- Top 8 Accounting Software in the Philippines - July 4, 2024